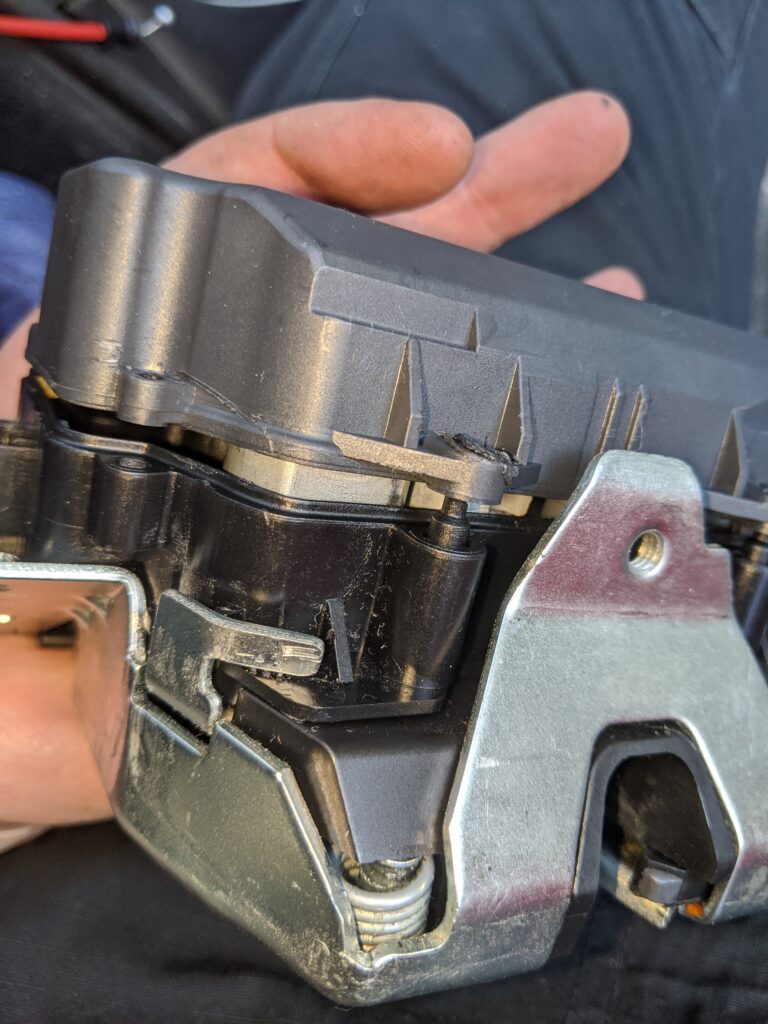
A common problem with the w164 chassis is the auto-pull-in electric rear hatch latch. These are known to fail, especially if the user operates the door without using the open/close assist hydraulic system (button/remote versus lowering by hand). The end result is a rear door latch that won’t open, close, or latch properly resulting in error messages and an unsafe condition. These little latches are very spendy and have gone through a few revisions. Not being one to give up easily and buy new parts, I wanted to see if I could have a go at fixing mine. The issue as I saw it first appear was that the door wouldn’t ‘pull in’ and fully latch. No amount of forcing would close/latch the door either so this was a safety issue worth fixing immediately.
I tore the rear panel off the rear hatch door, removed the three Torx screws, the emergency exit latch cable, disconnected the latch mechanism and pulled it out. What I found is below…a device that you must destruct to open and is not able to be re-assembled without additional ‘stuff’.
I started by cracking open the upper ‘plastic’ case by removing the tops off the plastic welds. A myriad of parts were inside, hopefully able to be replaced properly without issue when I’m done. The bigger issue was removing the middle body from the lower unit, as there is a flag arm/cam that engages with the metal bits of the latch and this has to be indexed ~200 degrees around to pass through an ‘assembly slot’. They clearly made this device to only go together, not come apart. Some tinkering with a few probes and flashlight I was able to rotate the mechanism and fully disassemble.
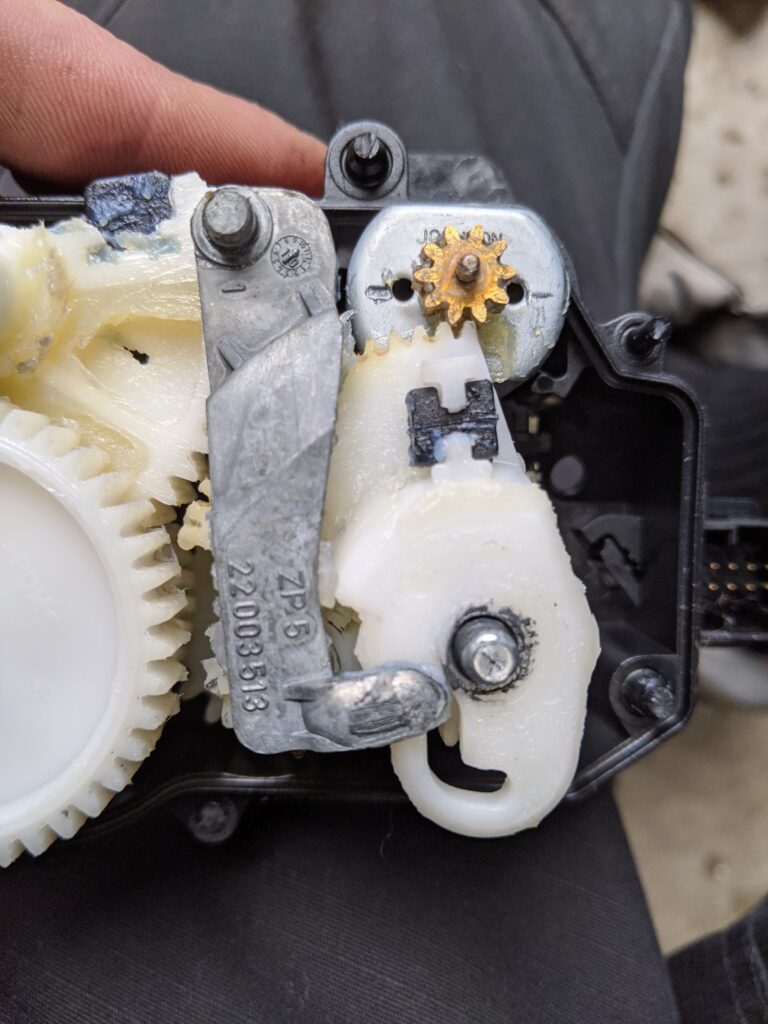
Lots of grease, complex components, but fairly well built. I started to poke around and found the issue fairly quickly, I had two pieces where there should have been one. I unstacked the gear train, spacers, etc and set them aside on a clean surface and extracted the closing mechanism shaft.
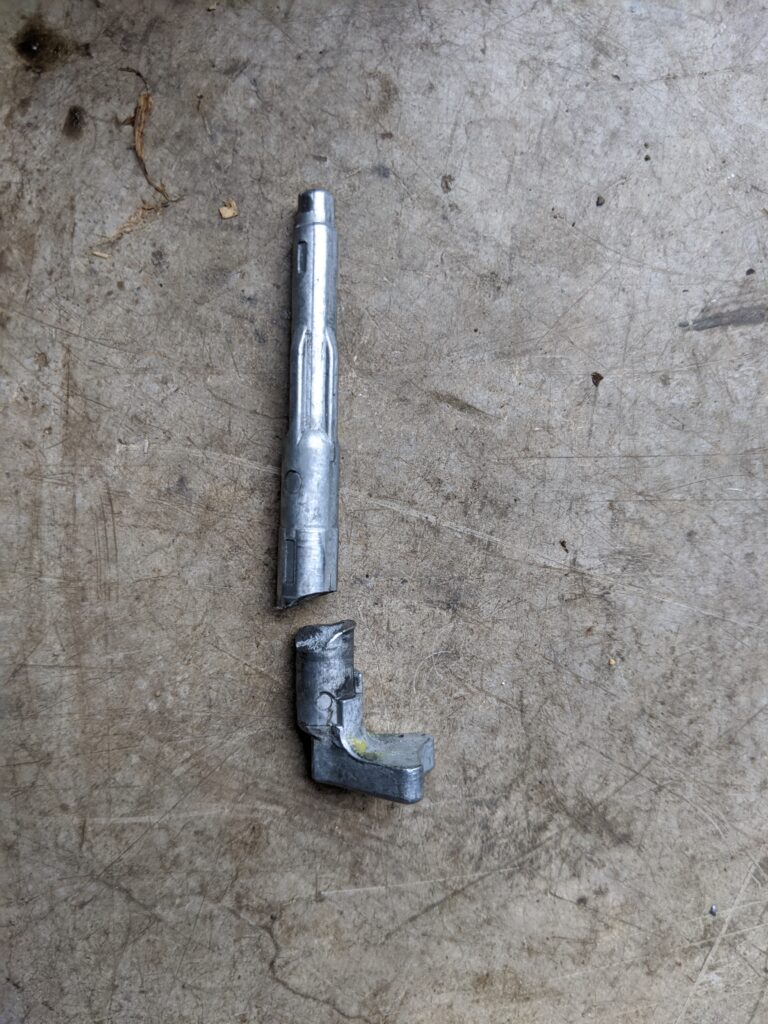
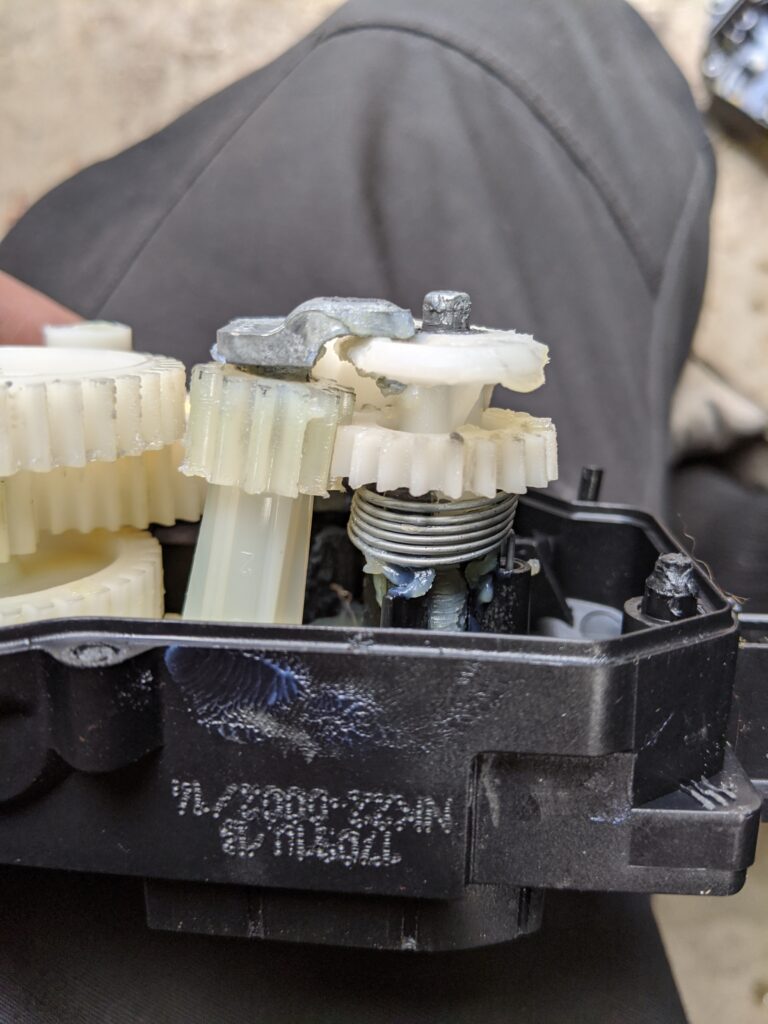
This item had a pretty ugly shear failure right where the shaft leaves the housing (and associated bearing support). That is a difficult fix as ‘gluing’ this joint would just result in an immediate failure. I’m going to need to add some strength, or build an entire new shaft out of something else. I opened to try the former.

I chucked the two pieces up in the mill and started removing metal. I also drilled the center of the shafts to fit a piece of drill rod for reinforcement purposes when it came time to assembly. This shaft needed to resist some pretty knarly torsional loads so I drilled deep.
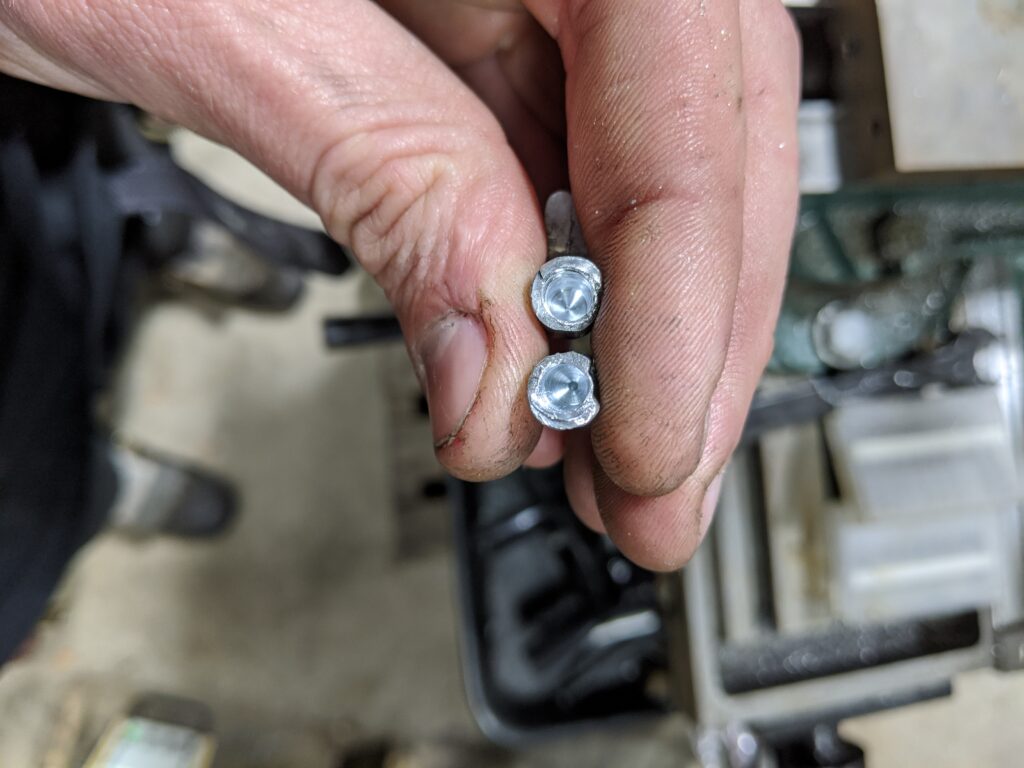
Tossed in the drill rod, did a dry test fit, and things are looking pretty good. Getting the bores perfect drilled/aligned was a challenge HOWEVER the gear that resides on the bottom (cam) side of the shaft has nothing specific about what it indexes with. The result was rotating the two halves before assembly to achieve the best co-axial configuration, making sure the two halves don’t push too far apart due to the un-clean shear.

Now it’s time for the JB Weld. I mixed up a small batch of the Quick Set after visiting my friend in the middle of the night, me unable to find my stash of two-part epoxies. Little bit of helping hands later and confirming the coaxial rotations, I assembled and confirmed length against ‘expected’ length gathered from pre-milling measurements.

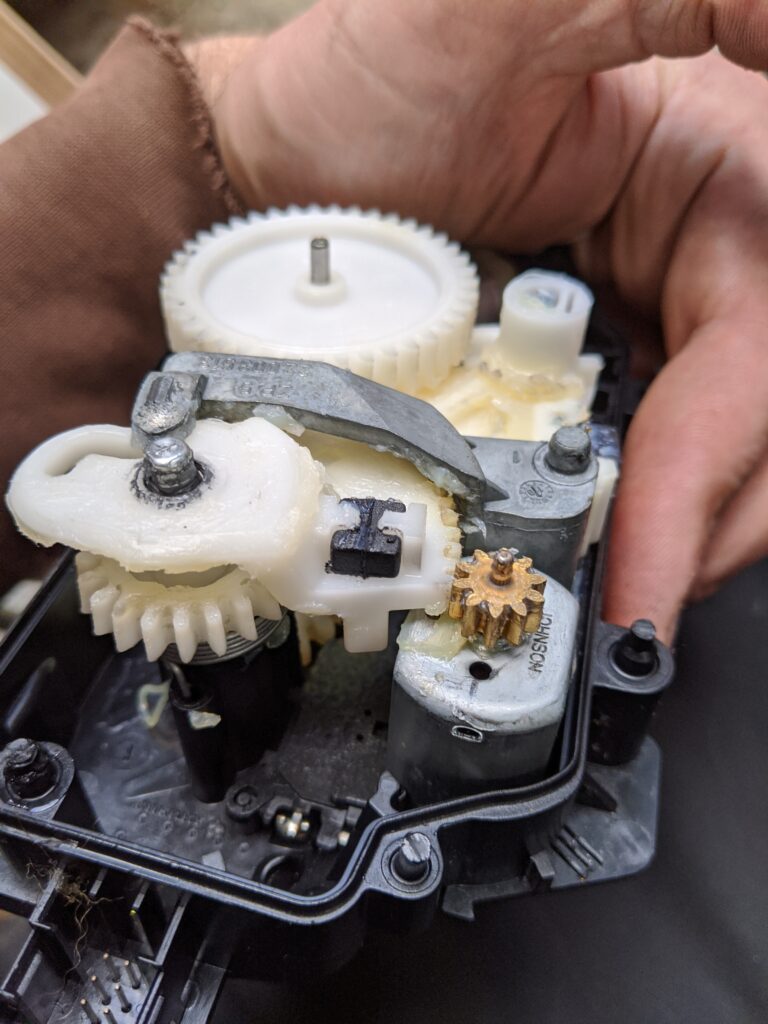
Once the shaft had some time to set up, I re-assembled the whole stack and indexed things back in their proper locations. The largest remaining hurdle was figuring out how to re-secure the upper housing plastic button welds that were now gone. I tried melting things but ultimately the solution was a bit less elegant.
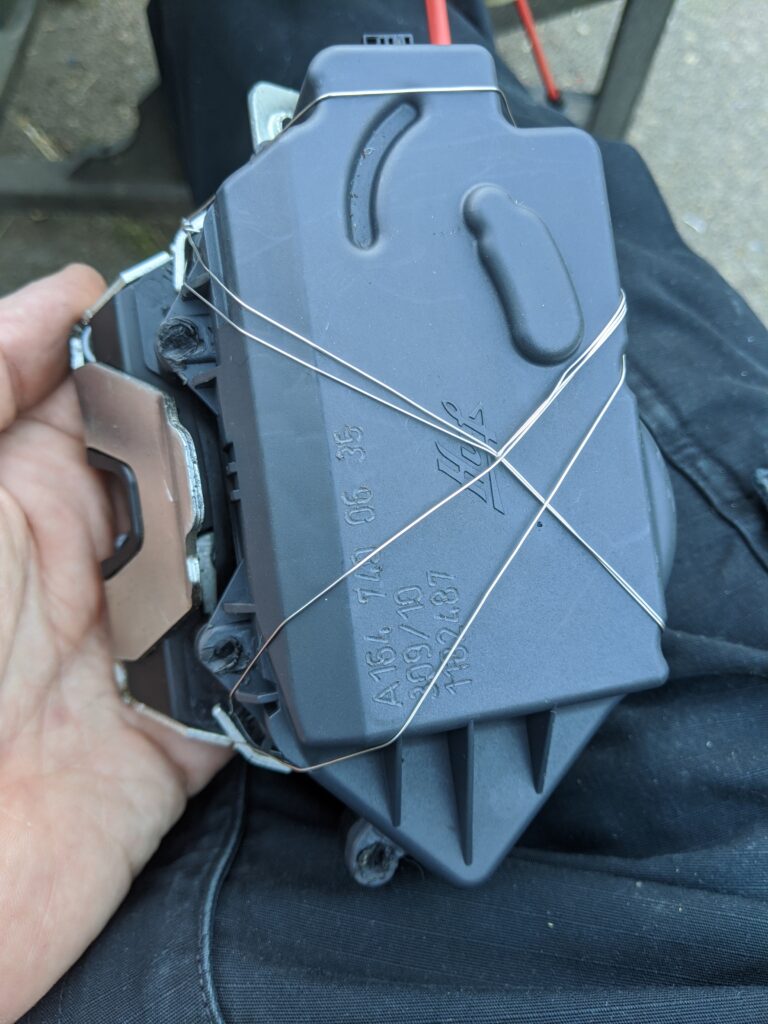
The latch has been performing well for a number of weeks now, hopefully continuing to do so for quite some time. I have my eyes out for another broken latch assembly to repair and have at the ready if the need presents itself. While the construction of the latch is fairly decent, the serviceability is far below my expected standard for Mercedes hardware, though this is a Huf brand mechanism (the supplier for Mercedes latches/locks/keys).
Thanks for reading along!